Single Sign-on (SSO) is a one-step user authentication process. If you are the admin of a HelpDesk account, you can set up SSO with the identity providers (IdP) of your choice. Your technicians can access HelpDesk using the IdP credentials without another password to manage.
Admin of a HelpDesk account can configure SSO to access HelpDesk by signing in to a central identity provider. To set up SSO, you need to first configure your identity provider and then configure your HelpDesk account.
To configure SSO for your HelpDesk account,
- Login to HelpDesk via web browser.
- 右上に表示されているユーザー名をクリックし、「マイアカウント」をクリックします。
- シングルサインオン」をクリックする。
- SSOプロファイルの名前を入力します。
- URLを入力し、IdPから受け取ったX.509証明書を追加します。
注:X.509証明書は.pemまたは.cer形式でなければなりません。 - シングルサインオンを設定する」をクリックする。
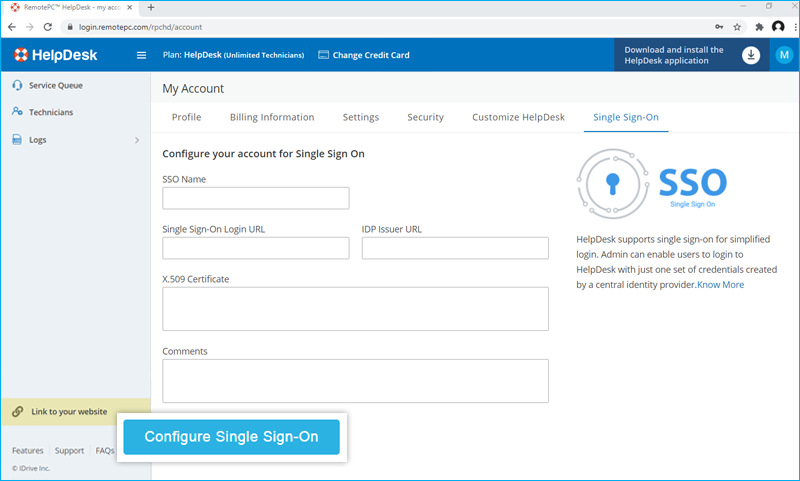
SSOが有効になるとメールが届きます。
Admin of HelpDesk accounts can either select SSO for login while inviting technicians to create an account or enable SSO for existing technicians.
To invite technicians to use SSO,
- Log in to HelpDesk via web browser.
- Go to the 'Technicians' tab and click 'Add'.
- Enter the email address in the 'Email Address' field.
- Select group and other preferences for the technician.
- SSOを有効にする」を選択する。
Note: If you select the checkbox, technicians won't have to set a password for their account.
- Click 'Invite'.
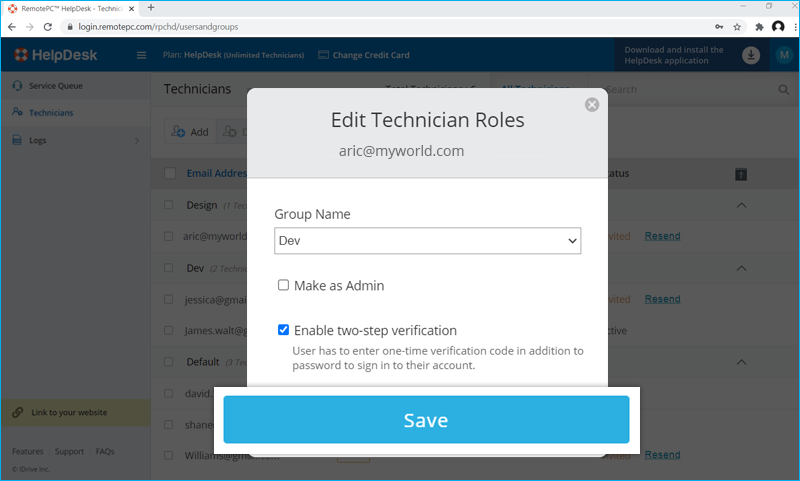
To enable SSO for existing technicians,
- Login to HelpDesk via web browser and go to the 'Technicians' tab.
- Hover on the technician you want to edit and click
 .
. - SSOを有効にする」を選択する。
- 保存」をクリックします。
はい、管理者はアカウントからSSOプロファイルを削除できます。
SSOプロファイルを削除するには
- Login to HelpDesk via web browser.
- 右上に表示されているユーザー名をクリックし、「マイアカウント」をクリックします。
- シングルサインオン」をクリックする。
- クリック
 削除したいSSOプロファイルに対応する。
 - Click'Delete' in the confirmation popup to remove the SSO profile.
Deleting the SSO profile will remove Single Sign-On for all technicians linked with this profile and they will have to use their registered email and password for login.
To disable SSO for a technician,
- Login to HelpDesk via web browser and go to the 'Technicians' tab.
- Hover on the technician you want to edit and click .
- SSOを有効にする」チェックボックスの選択を外します。
- 保存」をクリックします。
ユーザーのシングルサインオンを無効にした場合、ユーザーは自分のアカウントに新しいパスワードを設定する必要があります。一度設定すると、ユーザーはメールアドレスと新しいパスワードを使用してログインする必要があります。
はい、以下に説明するようなパラメータのセットとともに、SSO用に独自のIDプロバイダを設定することができます:
- HelpDesk uses SAML2 with the HTTP Redirect binding for HelpDesk to IdP and expects the HTTP Post binding for IdP to HelpDesk.
- SAML を使用して構成する場合は、以下の URL を使用して、変更を保存する。
- Single sign on URL:
https://www.remotepc.com/rpchd/sso/process - Audience URL (SP Entity ID):
https://www.remotepc.com/rpchd/sso/metadata
- Single sign on URL:
- ID プロバイダは、SAML アサーション、SAML レスポンス、またはその両方に署名する かどうかを尋ねる場合がある。
To login in to SSO enabled account via desktop,
- ログイン画面で「シングルサインオン(SSO)」をクリックする。
- Enter 'Email Address' and click 'Login'. You will be redirected to IdP web login page.
- 認証情報の入力を求められたら、IdP に登録されているユーザー名とパスワードを入力する。
Upon successful validation of identity, you will be prompted to go back to the desktop application and you can now continue using your HelpDesk account.
デスクトップ経由でSSO対応アカウントにサインインする、
- ログイン画面で「シングルサインオン(SSO)」をクリックする。
- メールアドレス」を入力し、「ログイン」をクリックします。IdPのウェブサインインページにリダイレクトされます。
- 認証情報の入力を求められたら、IdP に登録されているユーザー名とパスワードを入力する。
Upon successful validation of user identity, you will be prompted to go back to the desktop application and you can now continue using your HelpDesk account.