Single Sign-On provisioning setup - OneLogin (SCIM)
Admin of the RemotePC Team and Enterprise accounts can now set up provisioning for their users from the identity provider. RemotePC supports SCIM (System for Cross-domain Identity Management) provisioning method to provision user accounts.
To setup Single Sign-On (SSO) provisioning with OneLogin, the admin needs to:
- Generate SCIM provisioning token with RemotePC account
- Create and configure SCIM provisioning app
- Assign users to the provisioned app
Admin needs to generate and use the SCIM (System for Cross-domain Identity Management) provisioning token to sync all the users linked with their IdP to the RemotePC account.
To generate a token,
- ウェブブラウザでRemotePCにログインします。
- 右上に表示されているユーザー名をクリックし、「マイアカウント」をクリックします。
- Single Sign-On」タブに移動し、「Sync users from your identity provider」の下にある「Generate Token」ボタンをクリックしてトークンを生成する。
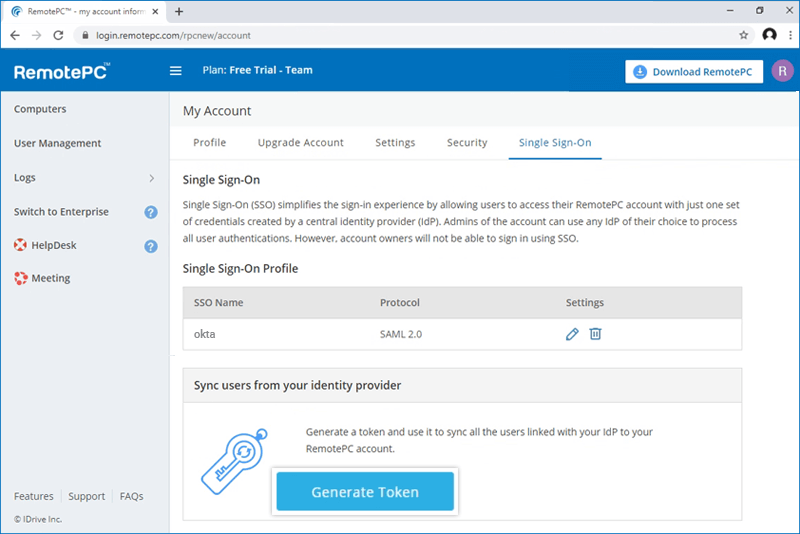
- トークンをコピーする」ボタンをクリックし、トークンをコピーして保存します。
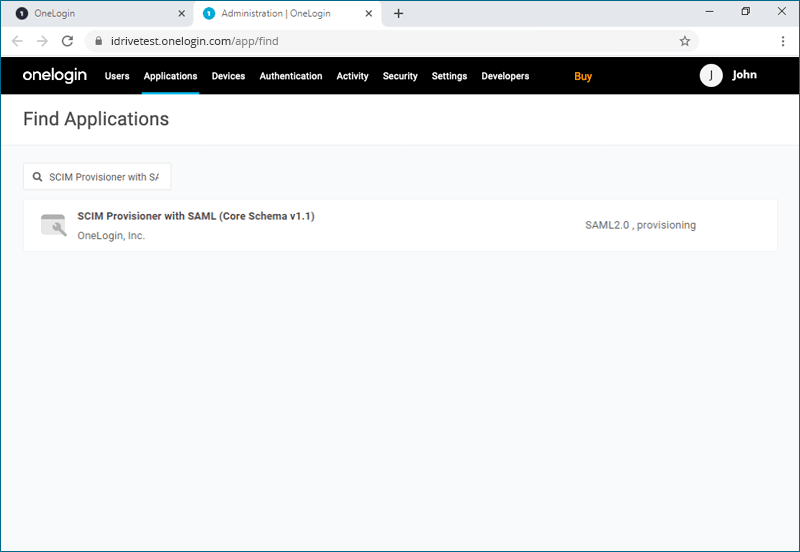
To configure SCIM provisioning for OneLogin, admin needs to create an app on OneLogin console.
To create the app,
- Login to the OneLogin console using your OneLogin account credentials.
- Click 'Administration' on the top right corner to view your admin console.
- Select 'Applications' from the top menu.
- Click 'Add App' and search for 'SCIM Provisioner with SAML (Core Schema v1.1)', and then click on the app to add.
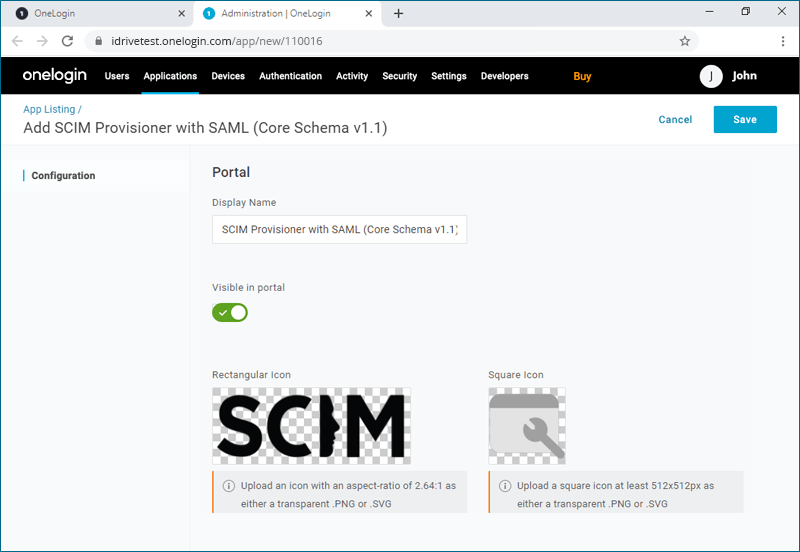
- Enter the app name and Click 'Save'.
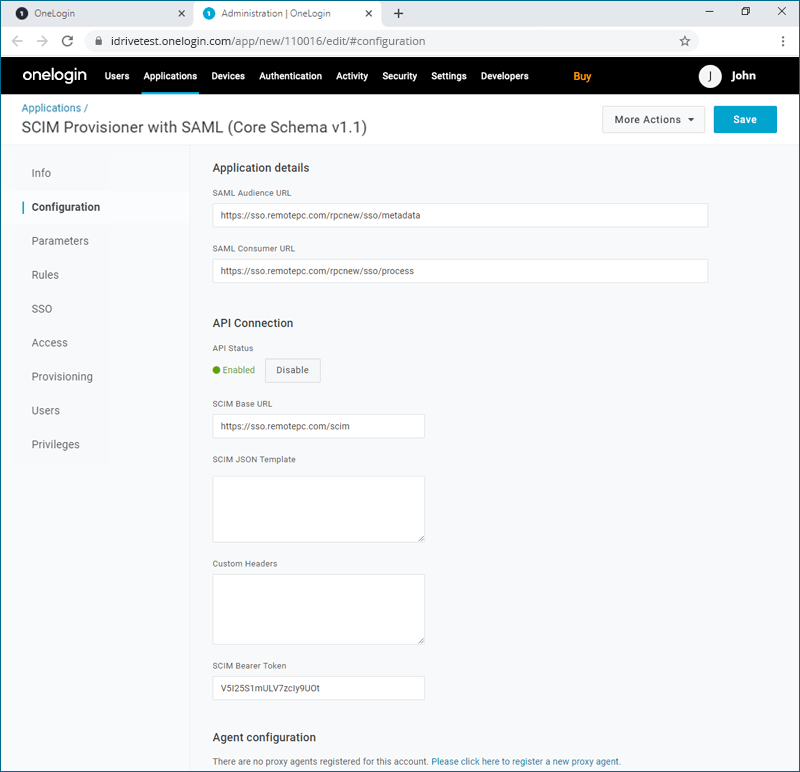
- Click 'Configuration' tab and add below URLs and token:
- SAML Audience URL: https://sso.remotepc.com/rpcnew/sso/metadata
- SAML Consumer URL: https://sso.remotepc.com/rpcnew/sso/process
- API Status: Click the 'Enable' button to enable provisioning
- SCIM Base URL: https://sso.remotepc.com/scim
- SCIM Bearer Token: Enter the SCIM provisioning token generated on your RemotePC account
- 保存」をクリックします。
To enable provisioning for user accounts, admin needs to assign users to the SCIM app created on OneLogin console.
To assign users and enable provisioning,
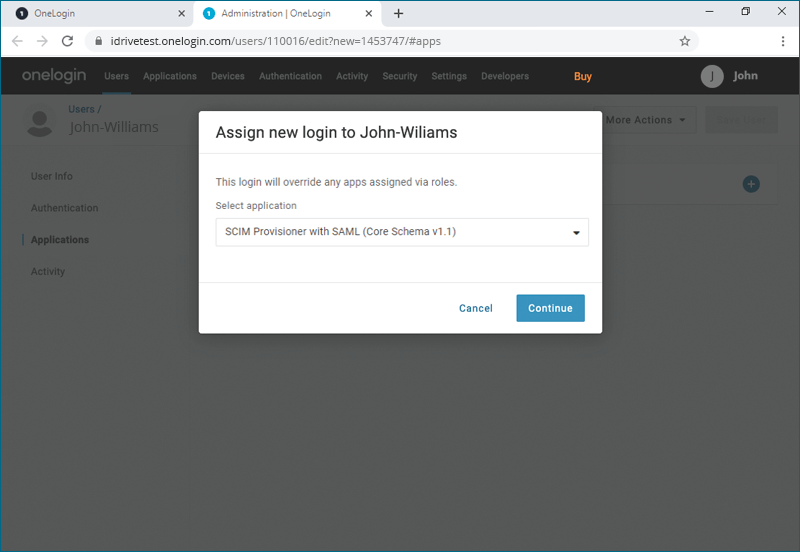
- Navigate to the OneLogin admin console. From the top menu, click 'Users' > 'Users'.
- Click on the user you would like to add to the app or click 'New User' to add a new user profile and click 'Save User'.
- On the user profile, go to the 'Applications' tab and click
 to select the SCIM app from the drop-down list and click 'Continue'.
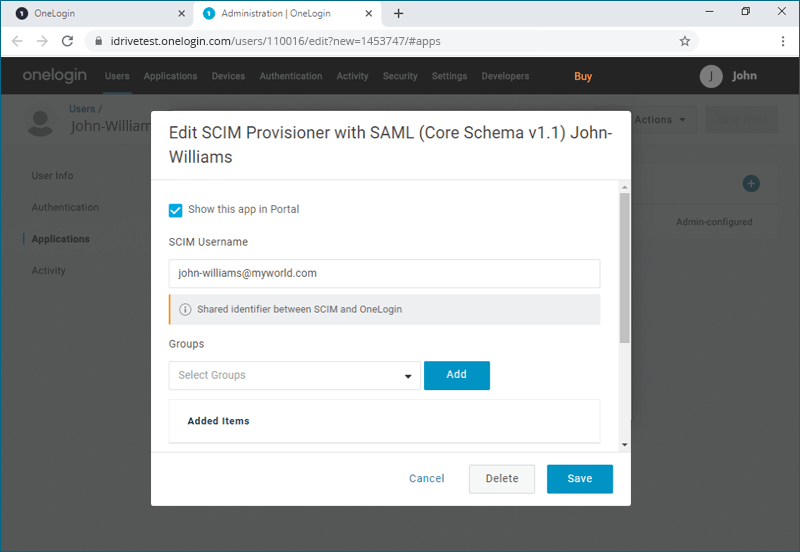
- Verify the 'SCIM Username' and click 'Save.
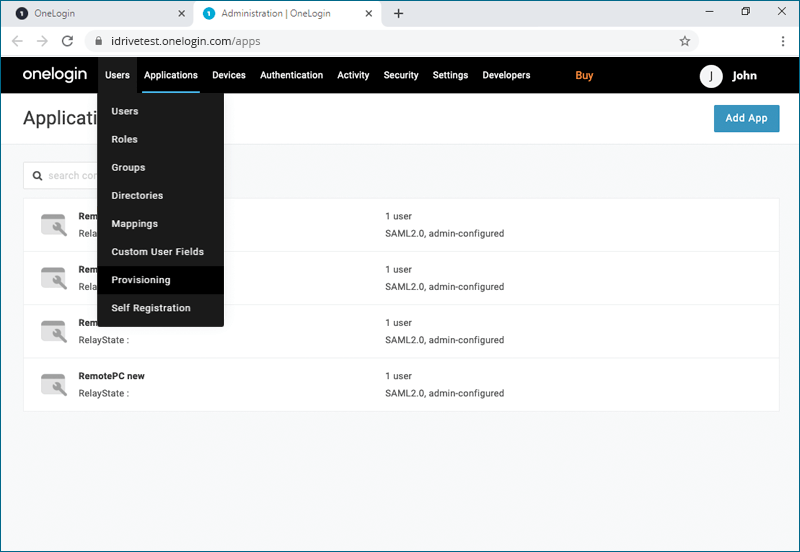
注: The 'SCIM Username' needs to be an email address. - From the top menu, click 'Users' > 'Provisioning'.
- Click on any user profile in which you wish to enable provisioning, and click 'Approve'.
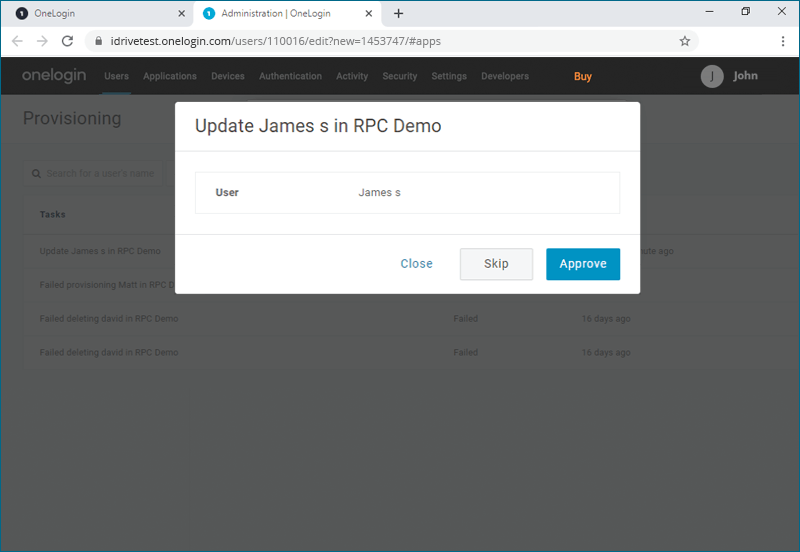
Once done, the selected users will be provisioned.